
Photographing your work using available light
This resource demonstrates how to use and make a reflector and diffuser from materials around your home.
This guide was first prepared for Architectural Photography (AWSS2023), tutored by Paola Talbert – we’re sharing it with everyone as it a useful skill to document any work for online submissions and portfolios.
Set Up
To get started, set up a space to document your work and create a backdrop from paper or card. A neutral backdrop helps eliminate distraction from your images.
Position your model, sculpture or drawing on the backdrop.
Experiment with the time of day, the angle of a reflector, and the distance between the subject and the reflector or light source.
The quality of light will change when working with reflectors and diffusers, so remember to take note of when the contrast increases or decreases and when the light becomes softer or harder.


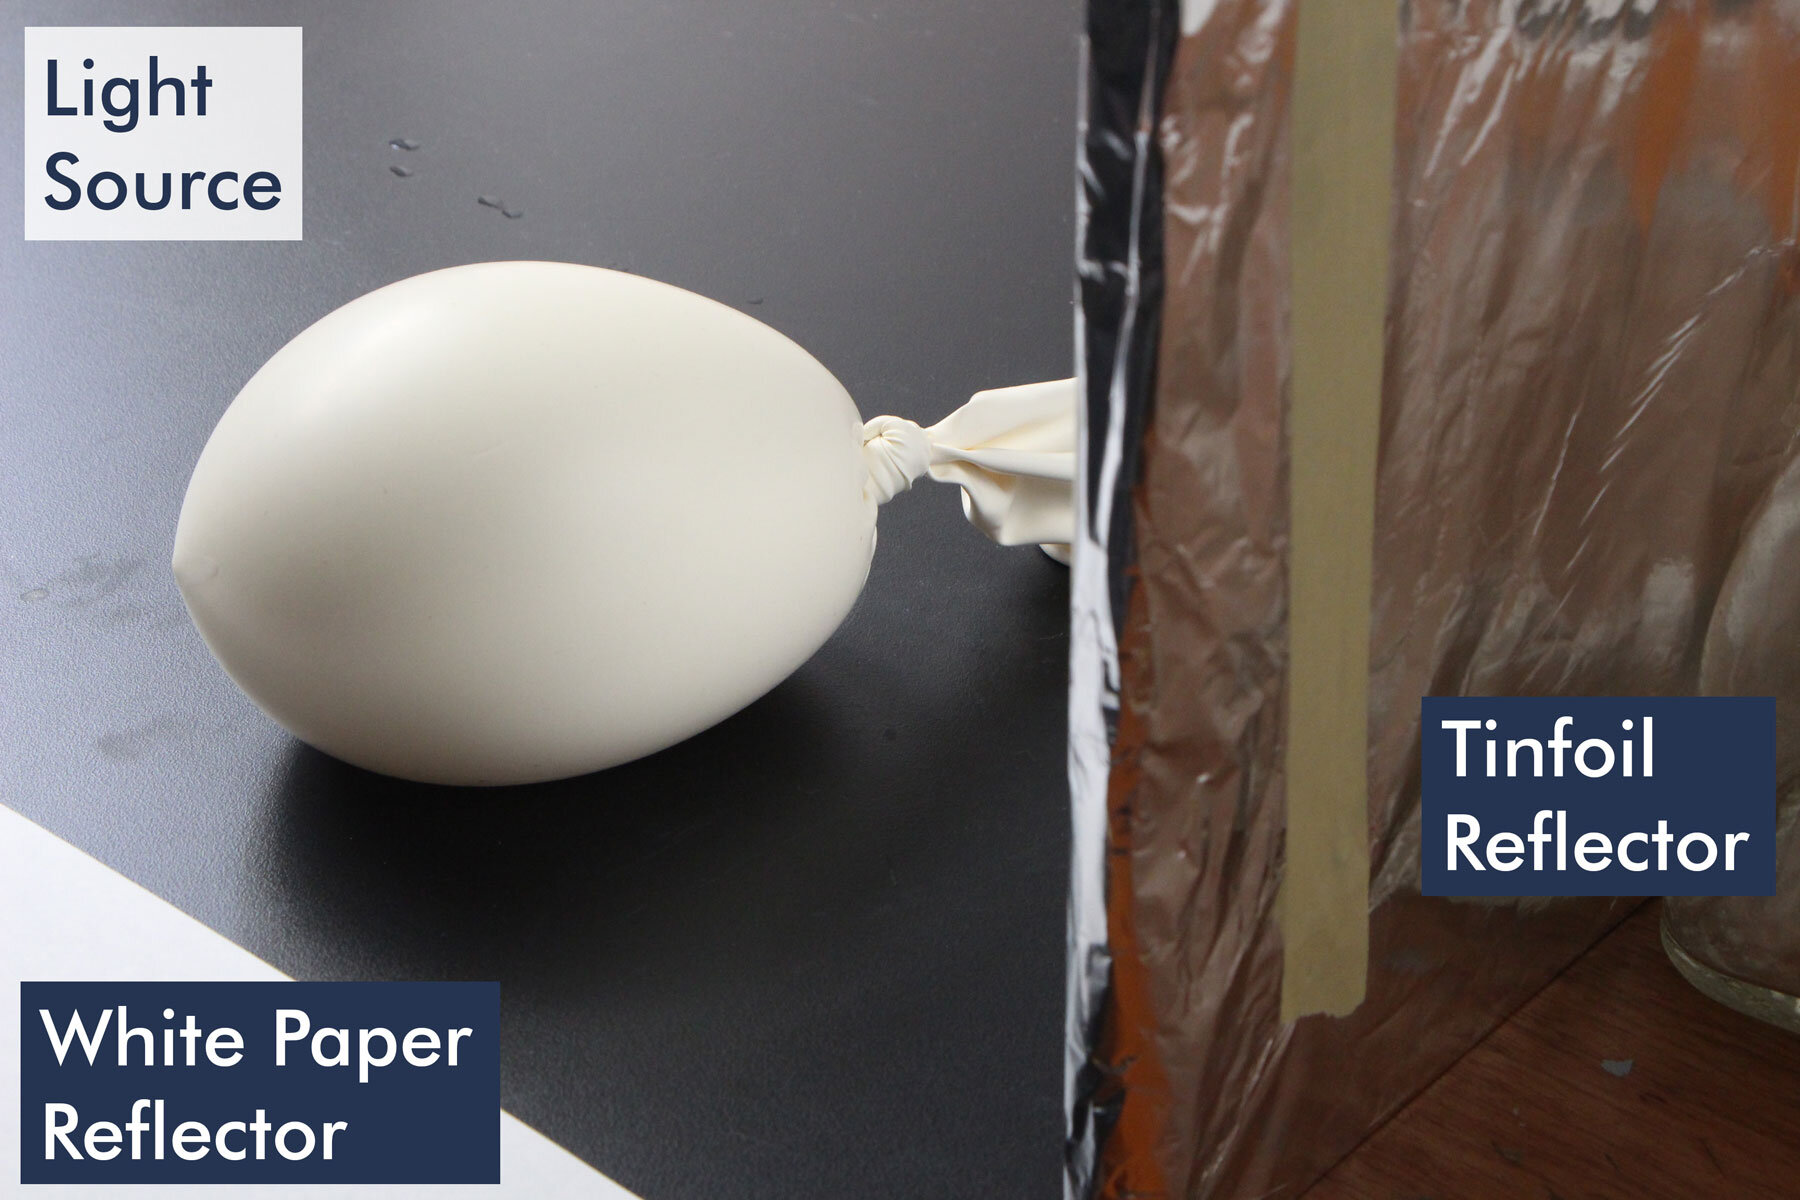
The position of the equipment and light source is indicated above.
Making a reflector
A reflector is a tool used in photography to direct light and control shadow on your subject.
These can be made at home from easily available materials. A larger surface area will be more effective at reflecting the light.
White Reflector
Large sheet of polystyrene
or White paper with cardboard backing
Any sheet of white material can be used to reflect light, even a notebook!
Observe the light and shadow on the surface of the object when you introduce or remove the reflector.


Tinfoil Reflector
Tinfoil
Masking Tape
Cardboard or timber
To make this reflector, wrap tinfoil around a piece of cardboard or timber and use tape to secure it.
Tinfoil reflectors will create higher contrast than white reflectors.


Diffuser
Baking Paper
Masking Tape
Create softer light by diffusing the light source with baking paper.
You can tape baking paper in front of a natural or an electric light source. Baking paper is temperature resistant, but be careful as it can still get hot depending on your light source.
The difference between hard and soft light will be more pronounced if you are working on a bright sunny day.


